
As of this month, my family and I have lived in this house for 13 years. Which...is wild, because back when we found it we thought it would be a 5ish-year situation until we were ready to size up. The reasons for us staying here are many, but we've house hunted for a long time (at least 7 years now) without having the right situation come up for us. So instead (for now) we're loving on the house we have.
Meaning...cozy, cottagey, a little old-world and vintage, but updated and pretty. Curated. A little bit rustic with a sprinkling of luxuries. Shabby chic meets old world with old money.
You get the vibe? I'm contradictory and unconcise as heck, so don't worry if you don't.
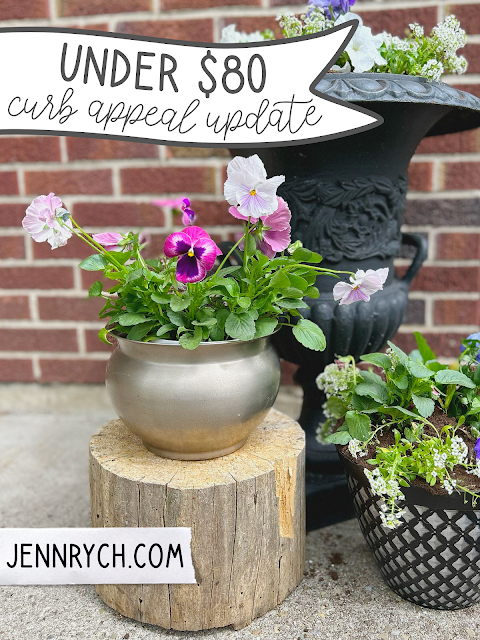
Last week, I kicked off a little curb appeal project that I've been cooking up for literal years. I was able to do everything I'm about to show you for less than $80 (I'll give you the cost breakdown towards the end!), and while it's nothing mind-blowing (or even finished), I am floored at the difference $80 can make!
I have a few pieces on the way to add to the whole situation, and I have plans to make a house number sign to hang by the front door (hoping to get the supplies this weekend!), so I'll update again when it's all finished. But here's what I did this past week:
- Painted both front doors black (yes, we have two)
- Weeded the front landscaping, pruned, raked in bone meal & got it ready for new plants
- Painted all three outdoor light fixtures on the front of the house
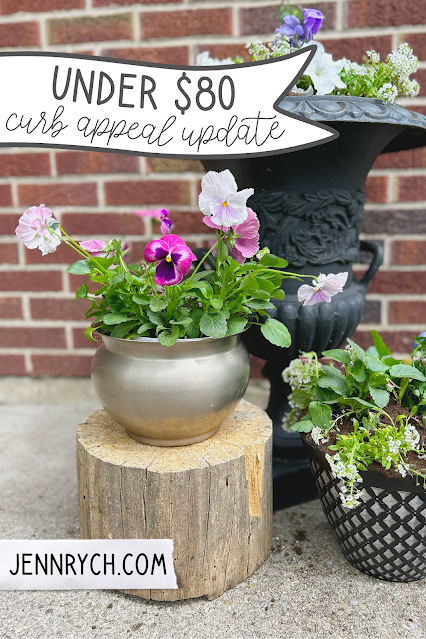
- Filled planters with flowers and decorated the front of the house
- Got a new welcome mat for the main front door
- Swept/weeded the driveway and little patio area, washed the doors inside and out
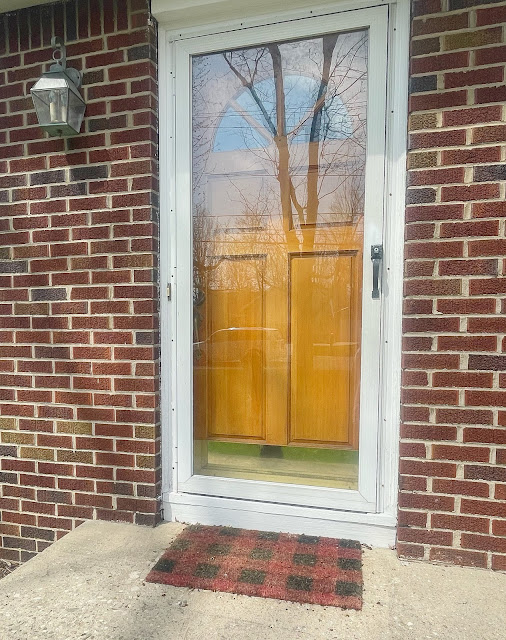
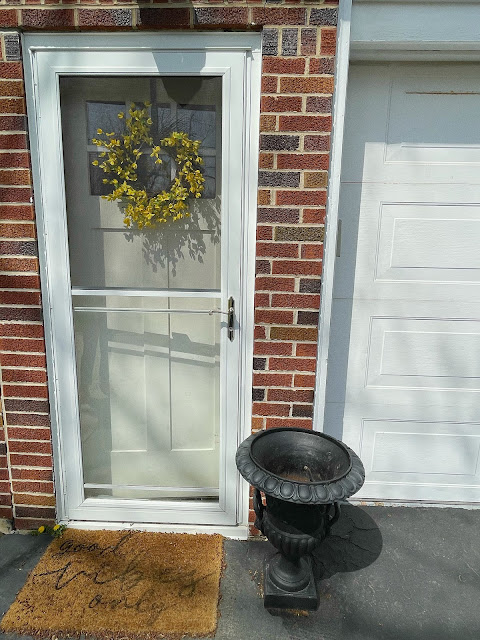
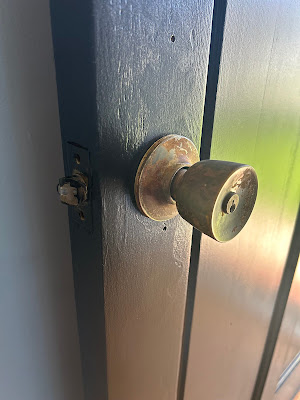
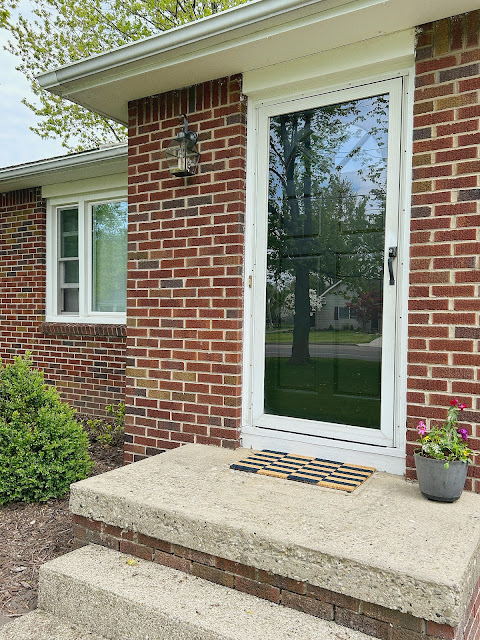
Here is what the doors looked like before I began:
20-25 years ago that attached the existing house to the free-standing garage.
I haaaate the orange stain on the main door, and the mudroom door was replaced about a year and a half ago, and we never painted it! It's been primed and ready to go, but we just hadn't gotten around to it. Part of the hold up was trying to decide what color looks good against brick, and not being sure if we wanted to make things neutral or bring in some color. Narrowing down my goals for the look of our house and doing a lot of Pinteresting helped us land on black.
A quick trip to Lowe's and a convo with a super-helpful paint guy later, I had everything I needed to jump in. I annoyingly had to wait for rainy weather to pass (for like...5 days!), and then off I went.
I started with the main front door because I couldn't stand the color and wanted it gone first! Prepping it didn't prove to be very difficult - the sun had already taken care of most of its finish! I washed it, took off the hardware, and lightly sanded it, and that was it!
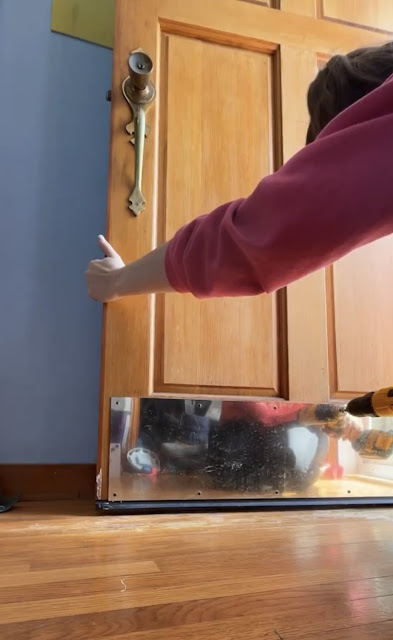
My one regret: when I took off this kick plate, the finish was still very much in tact under it. I resolved to just put it back on at the end to mask the difference in how the paint would finish....but this paint was amazing and you can't tell at allllll! So much so that I didn't want to put the kick plate back on, and so I wish I'd filled the screw holes. Oh well.
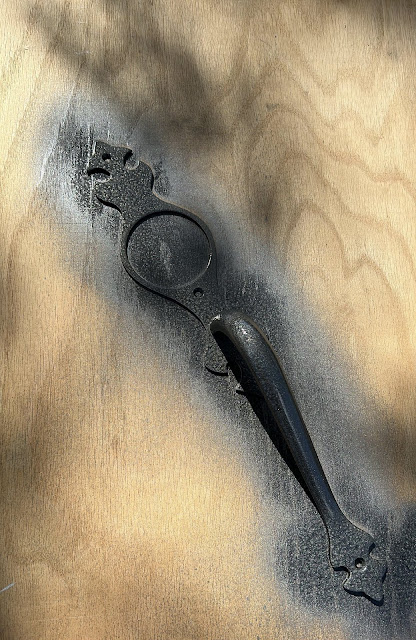
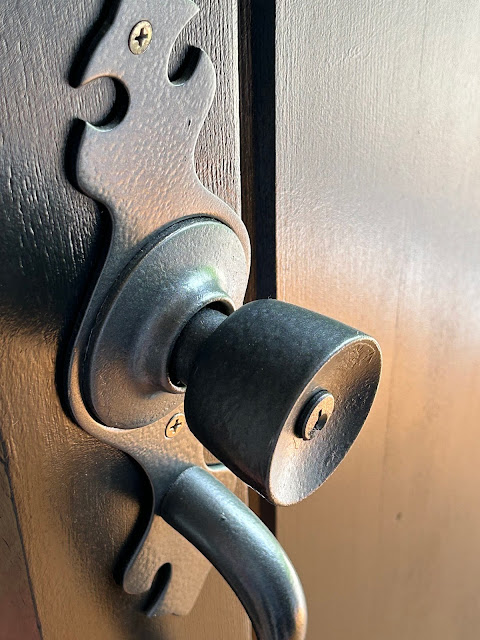
The sun did a number on the hardware, too! This thing was just...demolished. It was difficult to get off (though I'd already gotten the decorative piece that goes behind it off, you can see it's still on in the photo above), but once I did I painted allll of it. I'd gotten this really awesome hammered finish rustoleum spray paint that can go right over rust (and prevents new rust), and it worked like a chaaaarm on this!
Here's just a quick before and after of the first coat of it on the decorative part of this:

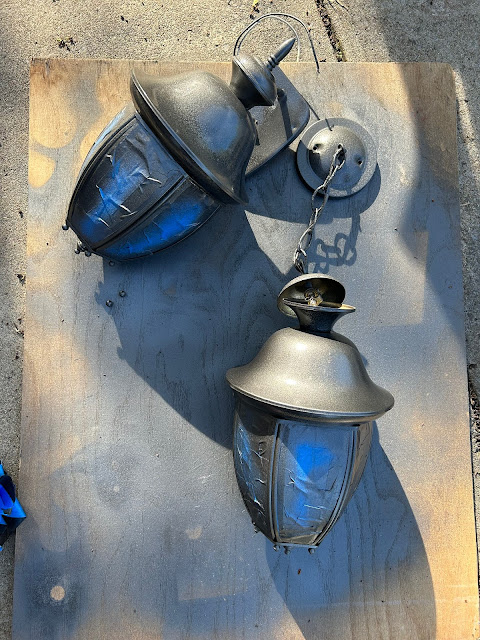


This took an entire Sunday and all the episodes of the new Bridgerton series (the Queen one) to finish. But I think it turned out great, and I was soooo glad to have it finished! And the show? Well, I could have done without all that torture, but the ending hit me right in the feels.
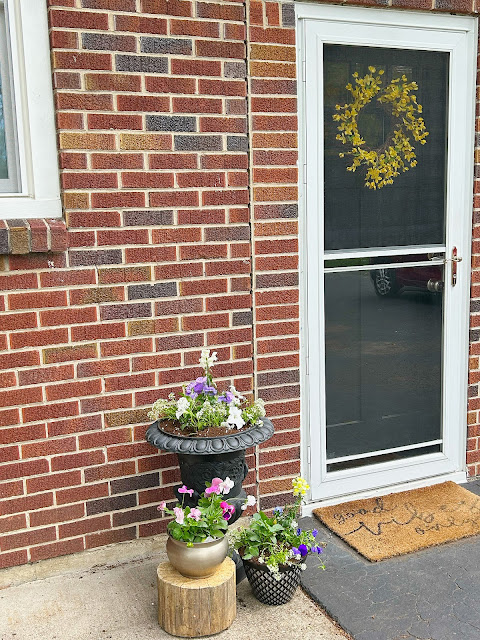
The project paused there - I needed to wait for a trip to get flowers and gathering some other supplies, and yesterday I got a bit farther on the project. Enough to share it, though as I said...there's still some missing pieces. But the overall impact so far makes me SO happy!
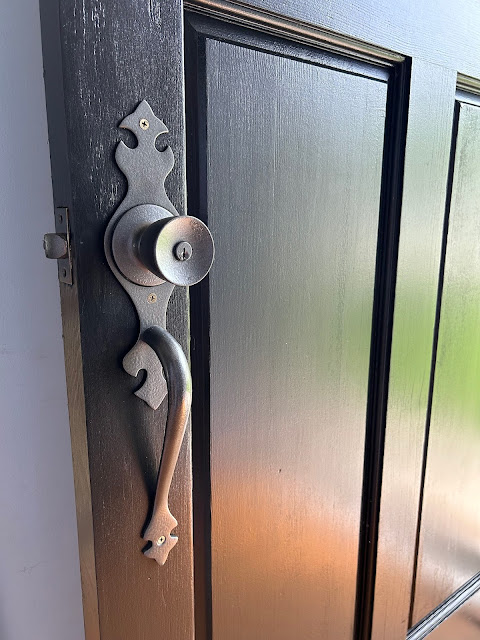
Here's the after:
Sooo much better! She's still missing the layering rug to go under that welcome mat (coming soon!) and the house number sign that will get hung right below the light fixture.

.jpg)
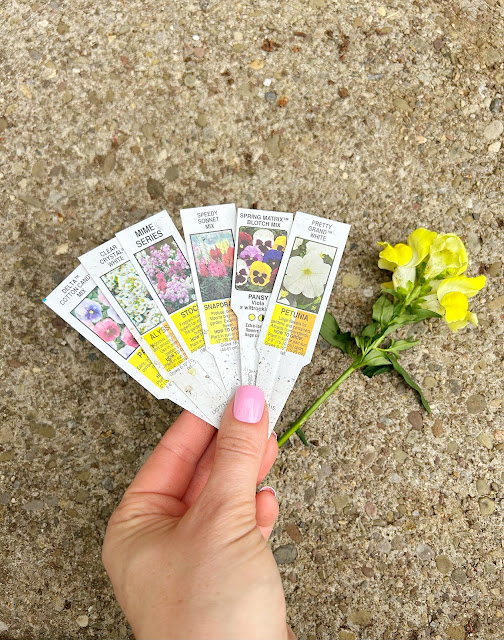
I'm so happy with it! BTW, here are the flowers I used in my planters:
Ready for the cost breakdown? I added links, too!
Rust-Oleum Door Paint Advanced Dry, Satin Black - $23 for 1qt at Lowe's
Rust-Oleum Matt Black Hammered Spray Paint - $9.98 at Lowe's
Welcome Mat - $7 at Target
Flat of Flowers - $19.99 (from Lavocat's)
Bag of Organic Potting Mix - $13.99 (used about 1/3 of it)
Pewter Planter - $3.99 at Salvation Army
Black/Pewter Planter - $1.25 at Dollar Tree
Black Iron Urn Planter - Free (Matt's mom gave it to us)
Wood Stump - Free (From our backyard!)
Total Cost: $79.20 (plus tax)
I know it's simple, but I love pulling up to the house to see these little updates, and to think that it was so inexpensive and uncomplicated! I wish I'd done it sooner!
More to come! Happy weekend!! :)

Delighted with the flexibility BERTopic offers, it allows customization and fine-tuning easily. The platform supports various embeddings, produces insightful visualizations, and simplifies complex text analysis. I sincerely appreciate the developers’ commitment to creating a versatile, practical tool for real-world applications.
ReplyDeleteEvery feature in UE4SS is designed for fast and simple asset extraction. The tool improves workflow, reduces errors, and maintains project consistency. It is professional, intuitive, and reliable, allowing developers to manage Unreal Engine assets efficiently while keeping projects organized.
ReplyDelete